
This past weekend most of the students from the bucking & limbing course reunited for the felling portion. We worked the same area again and actually ended up setting up logs for the next b&l course in Jan.
Disclaimer: We were cutting down dead trees (ie fire, insects, disease). No live trees were cut down during this exercise.
The cut we were doing is an open face. A traditional cut consists of a 45* and horizontal cut to create the wedge. With an open face you cut two angles. This creates a greater degree of control as the tree falls.
L-R: Traditional, Humboldt, Open face
Of course, it wouldn't make much sense to start cutting down 80' trees without practicing your techniques first. After using the stumps from our B&L class to practice our face cuts it was on to the bore cuts. Our instructor cut a stump leaving two 6-8" wide strips. We had to bore through the width of the tree without coming out the side. Here's what it looks like.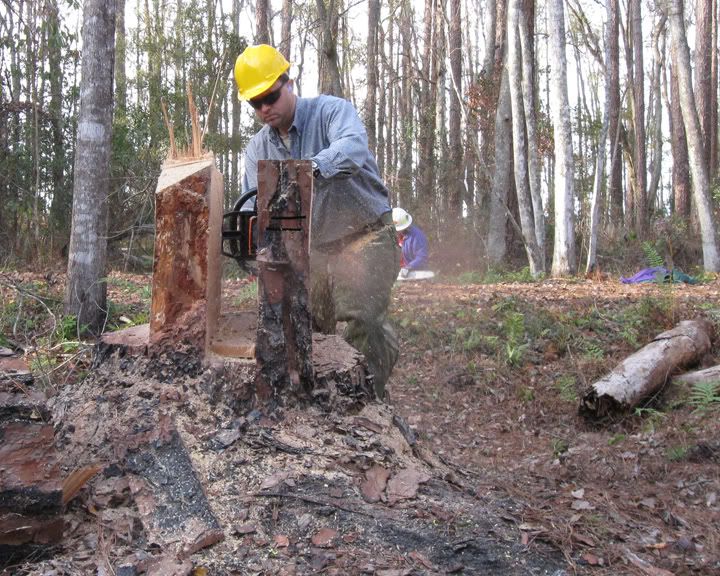
This will give you a little idea of how much wood we had to go through.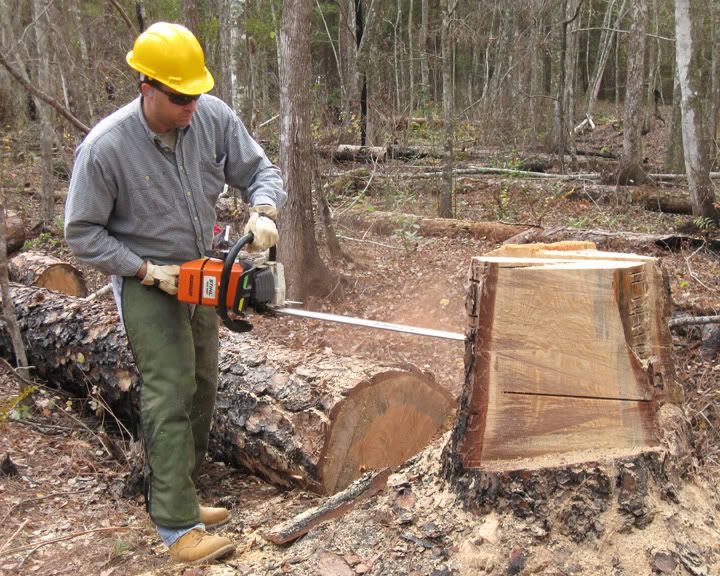
After making the face cut and the bore cut (this includes cutting the right amount of holding wood) you still have a backstrap. Even with so much wood removed, the tree is still sound. Unlike the traditional or Humboldt cuts, you can walk away from the tree with an open face and it's still a safe tree. You don't have anything to worry about until you release the tree by cutting the backstrap.
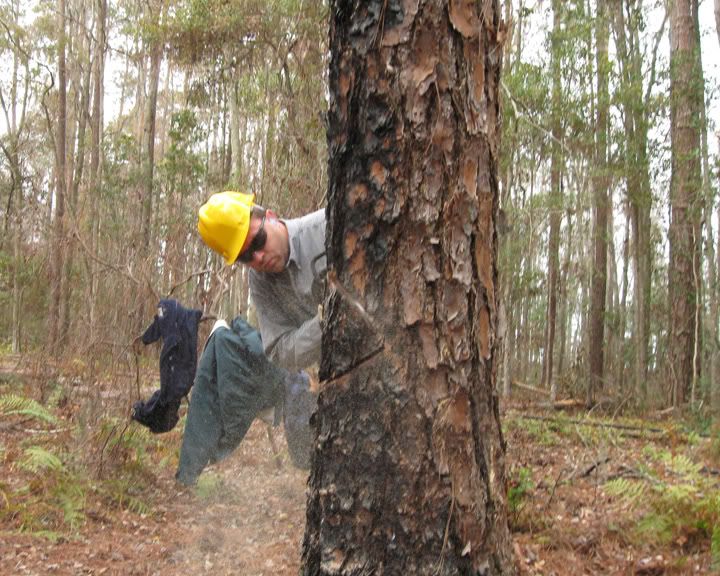
So after some practice cuts it was on to the trees. This is me making the face cut on my first tree.
And the aftermath. The key about this image is that my target was the burned out snag. You might notice that the tree I cut down is laying right next to it. Remember, this is the first tree I ever cut down. I hit the snag I was aiming for I broke off the top 4-5'.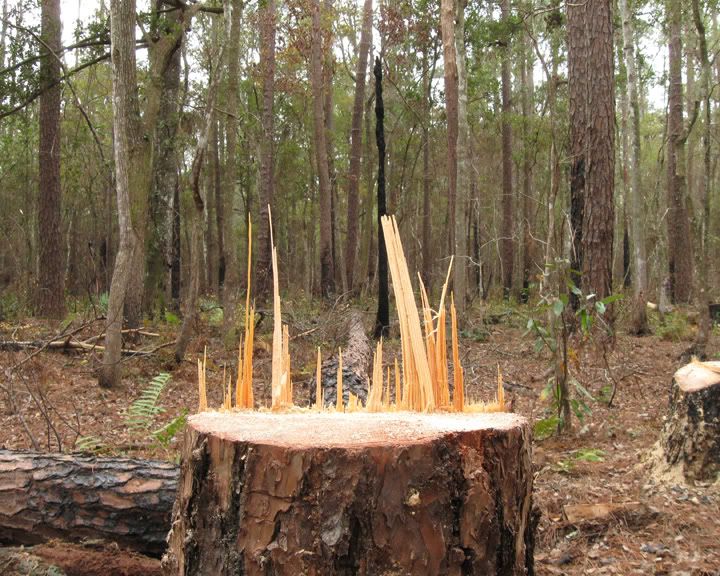
The fibers sticking up are part of the holding wood or the hinge. This helps control the tree on its way down. Notice that I have fibers all the way across. That's good holding wood baby. Here's a better view. Notice the nice face cut, near perfect holding wood, and a level back cut.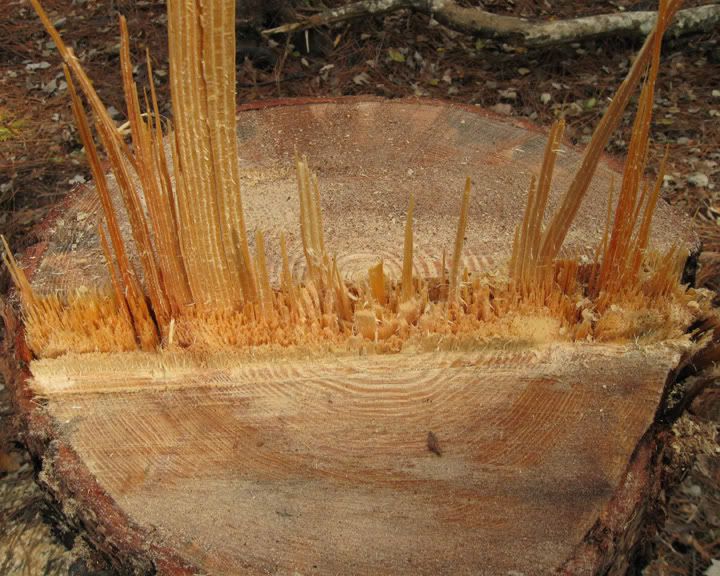
Here's a very brief video of my first tree coming down. Unfortunately I'm not in the frame. Oh well.
So there ya go. We had a great time and look forward to using our skills to maintain the Florida Trail.
Archive for December 2008
FTA Training Pt 2
FTA Training Pt 1
Greetings. This is quite a delayed update, but with good reason. On Nov 15th and 16th I participated in a chainsaw certification course through the Florida Trail Association. I wanted to surprise my brother so I didn't blog about it until I got my certification card in the mail. That took almost a month as it just arrived last week. I would've blogged sooner but this past weekend I was in the woods again for Part 2.
Bucking and Limbing
Part 1 of the certification is bucking and limbing. Most of what the FTA trail crews deal with is storm damage. If you read my entries about hiking through Ocala I mention how much debris blocked the trail. Since Ocala and Osceola National Forests are roughly in my immediate area that's probably where I'll be working. The US Forest Service has a requirement that anyone using a chainsaw in a National Forest must be certified. That was the purpose of this course.
So based on the primary role of clearing debris, it makes sense to start with the tasks of bucking and limbing. Limbing, obviously, is the process of removing the limbs from fallen trees. Bucking is the processing of cutting (or bucking) a tree into manageable sections. In some cases it may be as simple as cutting the section out that blocks the trail and leaving the rest of the tree to nature.
The first day was mostly classroom education. Paul Varnadoe was our primary instructor. He is the fire crew chief for the Osceola National Forest. We spent the day going over safety procedures, saw techniques, etc. We reviewed different pictures to identify hazards and improper actions as well as the best way to handle a situation based on all of the various aspects. We learned about tension and compression and how the different types of binds need to be approached.
After lunch we headed out to the shop to do a little hands-on saw maintenance. We went over proper starting methods and then broke the saws down completely to do full maintenance on them.
Day 2 was where the fun began as we started the field work. Paul and his partner Tim took us out to Osceola Pond and cut down a number of trees for us to practice our new skills on. We split into two groups and spent the day clearing the debris left by Hurricane Paul. :-) The trees were laid on top of each other to create different scenarios. We each had to demonstrate the ability to manage top and bottom binds as well as creating a wedge cut to clear a section of trail.
Here I am making one of my pie cuts. This tree had a top bind so I was cutting a wedge out to reduce the possibility of binding my bar.
Here's what the finished cut looks like.
Once the wedge is removed from the top you can bring the saw straight down. As the wedge closes it keeps the kerf (the cut made by the saw) from closing on the bar.
Here's a different angle of me making a cut. In this example I'm cutting the offside of the tree. I'll cut the side opposite of where I'm standing and then bring the saw back down from the top. I can also use the tip of the bar to remove the wood from the side facing me and then come up from the bottom to finish the cut.
This is the aftermath we left behind. Keep in mind that we were working on dead trees during this field exercise.
